Showing posts with label DIY. Show all posts

Sunday, 24 February 2013

DIY: crocheted beanie hat


I mentioned in this post that I was going to share the pattern for this easy crocheted hat, so here goes...

You will need
5mm crochet hook
Approx. 80g King Cole Moorland Aran
A tapestry needle to thread in the ends

Pattern
You begin the hat with a series of chain stitches.  I found it useful to measure a row of chains from the centre of the top of your head (where the top of the hat would be) to where you want it to end.  For the first hat I did about 40 chain stitches, and for the second hat *pictured below* I did about 50 chain stitches.

Leaving a long tail, ch between 40-50 stitches (depending on your preference).

Row 1: Once you have your row of chain stitches, Hdc in the back loop of the second ch from the hook.

Row 2-46: Continue to Hdc across the row in the back loop only.  Once you reach the end, *ch 1, turn the work and continue with Hdc in the back loop until you reach the end of the next row - repeat from * 45 times.

To finish: Join the beginning and end rows by matching the last Hdc with the first ch st and linking with a series of slip stitches to form a tube, fasten off and weave in the end.  Then using the tapestry needle, thread the long tail through the top of the tube with a running stitch, gathering the fabric as you go.  Weave through the top of the hat a number of times to make sure it's fastened well and won't come loose.


This is the first crochet pattern I've shared, so please let me know if you spot any mistakes or recommend any improvements.  I hope you have fun making this hat.  Please leave a link below if you decide to give it a try!

Wednesday, 20 February 2013

DIY: Gold Guilded Geode Rings


With Mother's Day fast approaching, I've been searching the net for some DIY inspiration.  I think this DIY from swellmayde ticks the boxes.  Have you found any good DIY's recently?  If so, leave me a comment - I'd love to check them out.

Wednesday, 12 December 2012

12 Days...

Gingerbread House from Rebekka Seale on Vimeo.

It's 12 days until Christmas! Are you feeling festive? I certainly am after watching this video, and now I want to go eat lots of gingerbread ;)

On a slightly rubbish note, my laptop is still in the shop and I have no idea when I will get it back (if ever). I've also come down with something, so am wrapped up in bed feeling sorry for myself. Hopefully after plenty of sleep and vitamins I will be back on track in no time.

Thursday, 15 November 2012

Washi Hanger


I just love alternative storage solutions.  Maartje from 'Silly Old Suitcase' has come up with a brilliant idea for storing your collection of washi tapes.

I'm in desperate need of organisation at the moment - I'm feeling a little chaotic!

Tuesday, 6 November 2012

DIY: Washi Tape Tea Lights


Since the dark nights have been drawing in I've been burning a lot more candles around my flat.  I love candles and always have a supply of various kinds knocking about the place - church candles, scented candles, bog standard house candles and of course tea-lights.  Tea lights are great because you can put them almost anywhere... they look great in jars and other glassware, on pretty plates, they're okay on their own too - but recently I've been decorating them with washi tape just to make them that bit prettier.
It's so easy, and here's how I did it...


Supplies needed:
1. Tea-lights
2. Washi Tape

That's it!  Simple.  I chose to stick to a polka-dot theme, just because I love polka-dots.


Wrap the washi tape around your tea-light.  Depending on the size of your tea-light, you may need to fold the tape underneath the candle (I did).


Tear off the strip and voila!  A lovely set of patterned tea-lights.  I will be doing this all the time now, and it also gives me an excuse to extend my washi tape collection ;)
If you're interested, I sell a set of yellow and polka-dot washi tapes in my shop - you can buy them here.

Ahh, these dark nights are not so bad after all.

Sunday, 12 August 2012

Giving: confetti gift wrap DIY


I love giving presents!  I find real excitement in picking that special something for someone I care about, and I love thinking up new ways of presenting them too.  This particular one is really simple...


All you need are these things:
1. Brown parcel paper
2. Sellotape
3. Hole-punch
4. Double sided tape
5. Paper cutter (or scissors)
6. Black craft paper (or any other colour/s you wish)

 Okay, so first you need to wrap your present...


Then make loads of coloured confetti with your hole-punch.


Use the double-sided tape to make any pattern you want on the paper.  I use the roller stuff because I think it's so much easier.


Now empty your hole-punch confetti and start sticking it to the pattern you've made on the present... And there you go!


There are so many possibilities with this DIY - you can do your friends' initials, chevron pattern, different colours or multi-coloured confetti.

Have fun making confetti gift-wrapped presents :)

Friday, 4 May 2012

Neon Necklace


Hello.  Today I wanted to share with you this simple DIY I found over on 'a pair and a spare' recently.  It makes me want to raid the charity shops for necklaces to spray neon colours!

Wednesday, 25 April 2012

DIY: Mosaic Mirror

Hello crafty people!  Today I want to share with you an easy DIY project that I completed a couple of weekends ago.  I've recently been swooning over anything gold, so when I spotted these self-adhesive mosaic pieces in Hobby Craft I knew straight away what I wanted to do with them...

 What you will need:
- Mirror (I got mine from Ikea)
- White acrylic paint
- Gold acrylic paint
- Paint brush
- Masking tape
- Mirror mosaics in colour of your choice (I used about 3 packs for my mirror)


Apply some masking tape to the inside border of your mirror to avoid getting paint on the mirror itself; then paint a base coat in white - this will help the second gold coat stand out.

 Paint your second coat in gold.  I did this so that the gaps between your mosaic pieces will blend better with the gold mirror.

 Start sticking your mosaic pieces!  You can do this in any way you like - you can be as neat or as random as you like with the pieces.  It takes a little while, so be patient.


Finished!  Now hang your shiny new mirror somewhere everyone can see, or prop it up on a ledge or mantlepiece.  Either way it's bound to brighten up a dull space.


If you give this project a go, I'd love to see your results - leave a link in the comments below.

Monday, 13 February 2012

LOVE day

Yes, tomorrow we celebrate all things lovely with love.  I must say, I love valentines day!  Even when I was single I loved valentines, but now (with the risk of sounding smug) I have the most wonderful manfriend a lady could ask for, I love it even more!

In celebration of St. Valentine here is my list of favourite V-related stuff from around the web...

This DIY garland found here.

Love matches found here.

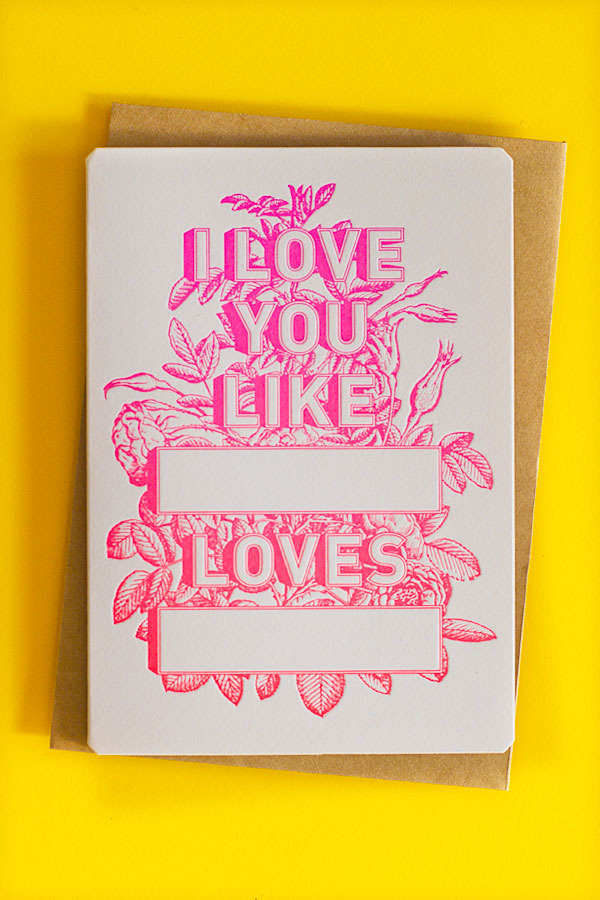
 Valentines card found here.

Love cookies found here.

Chalk heart found here.

So there you go peeps, my list of Valentine lovelies.  How will you be spending your valentines? I think it's fun to spoil yourself, or someone else, even if it's with something small but thoughtful.  Chocolate is always a good one.

- Lois x

Sunday, 4 December 2011

Best of Xmas crafts (so far)

There are so many amazing ideas out there for Xmas themed craftiness that I don't know where to begin.  Every day whilst catching up on my on-line reading (thank you Bloglovin), I stumble across new ideas and fresh inspiration.  If only I had more time in the day!

So anyway, I've compiled a list of links to some of my favourites so far.  Take a peek...

 Globe snowman family by Emily Henderson (via CRAFT)

Washi tape Christmas tree (Omiyage Blog)

Snowflake garland (Itchin' Stitchin')

Bauble wreath (Matt & Becky)

Paper hanging decorations (Nest)

Reindeer button portrait (The Daily Telecraft)

I will definitely be trying out at least one of the above.  I'll keep you posted.  In the meantime I'm thinking up lots of easy-to-accomplish gift and wrapping ideas to make giving that little bit extra special this year.   Notepad at the ready...

- Lois x